Trenchless pipe repair is a long-lasting no-dig drain repair solution.
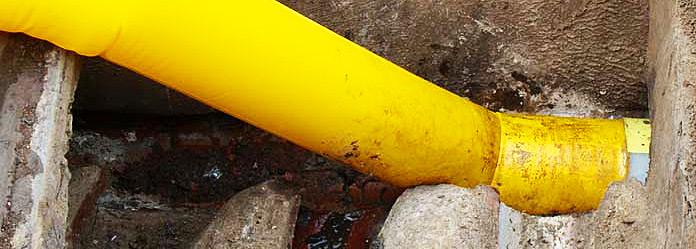
Installing a drain pipe lining is one of the easiest ways to rehabilitate old drain clay pipes. The process of cured-in-place pipe (CIPP) lining is quite efficient and effective, rendering the old pipe replaced with an extremely durable new interior – in many ways stronger than the original pipe. Let’s look at how the task of trenchless, no-dig drain pipe repair is accomplished.
First, Drain Pipe Inspection
To prepare for drain lining we need to inspect your drain pipe to discover any problems such as debris, or damage. Using a CCTV inspection tool we’ll look for typical problems e.g. collapses, roots, and blockages. Once we’ve discovered where the problems are in the drain we’ll clean it out utilizing the most effective means of drain cleaning; drain snaking. Once the drain has been snaked we’ll need to flush it with water to ensure that it is completely free of all debris.
Bladder Instillation
So we’ve inspected your drain using a CCTV camera to find problems and cleaned it out entirely. Now we need to get ready to install the drain liner. First, we install the bladder into a tube which has been created using flexible, laminated felt designed to carry an epoxy resin – made out of a polyurethane membrane, the bladder has been specifically manufactured for this process and is capable of withstanding a pressure of up to 30 PSI.
Readying The Epoxy
Next, we mix up the epoxy which is used to harden the drain liner. Utilizing a two-part epoxy for maximum strength and long-lasting durability, we mix up precise quantities of resin and hardener in accordance with the length of drainpipe liner we will be installing. Care must be taken during this phase to create an ideal finished product. Once the epoxy has been fully mixed it is then used to saturate the liner by means of a vacuum suction at one end and a roller to push it through from the opposite end. The result is a liner saturated in epoxy.
Installation Of The Drain Liner
A small hole will need to be excavated to access the old pipe, the liner/bladder assembly is then inserted into the old clay pipe. Utilizing specialized pushing rods the liner can be installed into lengths as long as 30 feet long. Once the liner assembly has been completely installed it is inflated to approximately 12 PSI for a length of time typically three to four hours. Once the liner has fully cured the pressure is released and the bladder is extracted, leaving behind a newly formed pipe.
Final Inspection Of The Drain Liner
After the new liner has cured a final CCTV camera inspection is performed to ensure the quality of the final product. At this point, all that’s left to do is connect the newly created pipe to the pre-existing sewer system.
If you have any questions about the installation of drain pipe lining please contact us using our estimate form, or feel free to call us directly.


