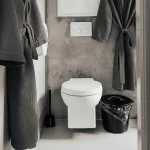
Toilet installation isn’t the easiest task in the world; unless you are pretty clued up at DIY stuff it’s probably better to get a qualified person to do it. If you want to attempt it yourself, however, these are the steps you need to follow, assuming you already have a bathroom with the necessary sewers, residential plumbing and water installation in place.
Step 1: Buy the Fixtures
Choose the toilet you want based on the amount of space you have available. Take into consideration whether you want a round or elongated bowl shape, the height, and type of flush mechanism. Along with your toilet and the tank that goes with it, you’ll also need the following items:
- Wax ring
- Closet bolts
- Toilet connector
- Washers
- Torpedo level
- Adjustable wrench
- Screwdriver
You can usually purchase everything you need for a DIY toilet installation from Home Depot or one of the other home hardware stores that abound in Toronto.
Step 2: Assemble the Toilet
This isn’t essential at this stage, but it’s good to have it put together before you begin the toilet installation. That way, if you have any questions about whether something is going fit correctly you can test it with the fully assembled toilet, rather than having to rely on your measuring tape.
Step 3: Installing the Flange
Stand your toilet on the floor where you plan to install it. Trace around the base of the flange with a pencil to mark the size and location of the pipe. Then cut out the section of flooring according to your markings, making sure the hole is wide enough to fit the closet flange.
Fit the soil pipe into the bend of the closet and then position the flange over the pipe, making sure the collar of the flange is flush with the floor. Once you have the positioning correct, you can add primer and cement to seal it and secure the collar to the floor with stainless steel screws.
Step 4: Install the Toilet
Place the wax ring over the collar and set the toilet on top of it. Line up the holes with the closet bolts and fasten them tightly, then cover them with bolt caps for aesthetic purposes. Check the level of the toilet and make sure it’s securely fastened to the floor and there’s no risk of it tipping over when in use. Lower the tank onto the back of the toilet and make sure that the water outlet from the tank is lined up properly and seated firmly. This will prevent your toilet from leaking and costing you a fortune. Connect and fasten the tank bolts to the toilet.
Step 5: Connect the Water
One of the most important aspects of your toilet installation is obviously the water, so turn off the water supply and connect the supply line between the tank supply and the stop-valve outlet. Fasten the line using a plastic nut, compression nut, and compression ring and tighten the nut with the wrench. Turn on your water supply and test the toilet by flushing several times. Check for leaks and any problems with the flushing mechanism.
Don’t attempt toilet installation unless you’re fairly certain you know what you’re doing. If your home is one of Toronto’s older houses, this is a good time to get a drain camera inspection and check whether your sewer is in good condition before fitting a new toilet.


